Tuesday, May 6, 2014

Culminating Blog Reflection

Looking back at previous blog posts, I realized how much knowledge I had gained from completing this project. I remember contacting Neil in the very beginning and warning him that I had next to no experience about computer hardware. Now, I'm educated in everything from file systems to hard drive types to network troubleshooting with a command line. I made most of my growth intellectually, which is exactly what I aimed for when I started this project. I had planned to pursue a career in Computer Science since my freshman year in high school, but I found that I actually knew little about it. My Capstone project not only gave me valuable experience with computer technology, but also practice with professionalism and collaboration.

I did encounter multiple hurdles in the beginning of the project- which I would eventually triumph over. I wrote my essay on how there is an unnecessary fear of violent video games and their effect on people- something I feel very strongly about. Since I was having trouble finding possible places to get a mentor at, I decided to partner with a classmate of mine. Together, we contacted numerous groups and businesses in the video game industry, but in the end we were either rejected or ignored. As the deadline for finding a mentor approached, I decided to look for a well rated computer repair shop on yelp as a last resort. Although this was far off my essay topic, I knew I could still get essential information for my career in the Computer Science industry. Today, I'm glad things worked out the way they did, and I'm delighted with the knowledge I gained in computer repair and servicing.

The next hurdle was actually meeting my mentor. Neil was revealed to be an extremely busy man- working from mornings to almost 11 o'clock at night- so we needed to find a way to get our hours for our project without disturbing Neil too much. We eventually decided to go through a set of tutorials that Neil gave to his employees-in-training, and this is what I spent a majority of my time working on for my project. I also felt it was best to get some hands-on experience, so my partner and I asked Neil if he would accept disassembling and reassembling our computers as hours, which he approved. This was definitely my favorite part of my Capstone Project- for the first time I honestly felt skilled handling and recognizing computer hardware, and I had fun! When I first saw the inside of a computer, all I saw was a mess of wires and circuit boards. After my capstone project, I was able to identify and understand every individual part, which is overwhelmingly satisfying and even exciting for me. Although I was presented with numerous roadblocks, I was able to both work around them, and gain a substantial amount of knowledge in my desired field of study.

I know that my project was not as "physical" as others- most of the time I was either sitting behind a computer or digging into one- and I know that the content I covered would be seen as boring to many. Personally, however, the whole experience was very interesting and enjoyable. I'm now confident that I will enjoy working in the Computer Science industry later on, and I'm excited to dive in and learn more about it!

Thursday, May 1, 2014

Section 1.5- 1.10

I've done an additional two and a half hours of tutorials and note taking within the past two days. Section 1.5 went over a concept that I had never heard of before- RAID- or a Redundant Array of Independent Disks. The tutorial went over RAID 0, RAID 1, RAID 5, and Nested RAID (or RAID 1+0). RAID is a method of storing data over multiple disks to gain redundancy (reliability in case of an error) and efficiency (writing data over multiple disks takes much less time than it takes to write a whole file on one disk). The tutorial went over 4 different RAID methods, and outlined their differences. 1.6 taught about CPU socket types, CPU characteristics, and methods of cooling the CPU. The first section went over the different sockets for AMD and Intel processors that have appeared over the years- and how to identify them on a motherboard. The next section then described how to rate the speed of a processor, explained cache memory levels, and then went over model-unique characteristics such as hyperthreading (a performance upgrade by Intel), virtualization support (to run multiple operating systems on one client), and integrated graphics processing units. The last part of 1.6 went over heat sinks, on-board fans, case fans, and liquid coolant to bring temperatures down inside of a computer. 1.7  briefly taught about different interfaces and case sockets- like USB ports or SATA ports for hard drives. 1.8 was about powering computers, and what happens when you plug in your computer to an outlet. Once you plug in your computer, the power supply within your computer then turns the alternating current from the outlet into direct current- which computer components can use. The power supply also is responsible for distributing the power correcting and regulating the Watt output. 1.9 taught about designing custom computer systems- and choosing appropriate components for certain situations. For example, an office employee who uses their computer mainly for document writing will need a computer build that is much less intensive than a video-editor- who may need specialized audio and video cards. Lastly, 1.10 discussed computer displays- and which might be best for certain situations. For example, a Plasma screen displays color accurately and has a good response time, but uses a lot of power and may not work well in high-altitude locations. LCD displays use less power, but since they always have a back-light, they don't display dark colors accurately. After going through Section 1 of my second group of tutorials, I've noticed a huge increase in my knowledge of computer hardware. Going back through the pictures I took of our desktop, not only was I able to identify what each component was but also how it functioned. I would say that this is the greatest sign of my overall improvement. With these additional two and a half hours, I now have a total of 27.5 hours.

Tuesday, April 29, 2014

The Dell Dimension 3000 Disassembly

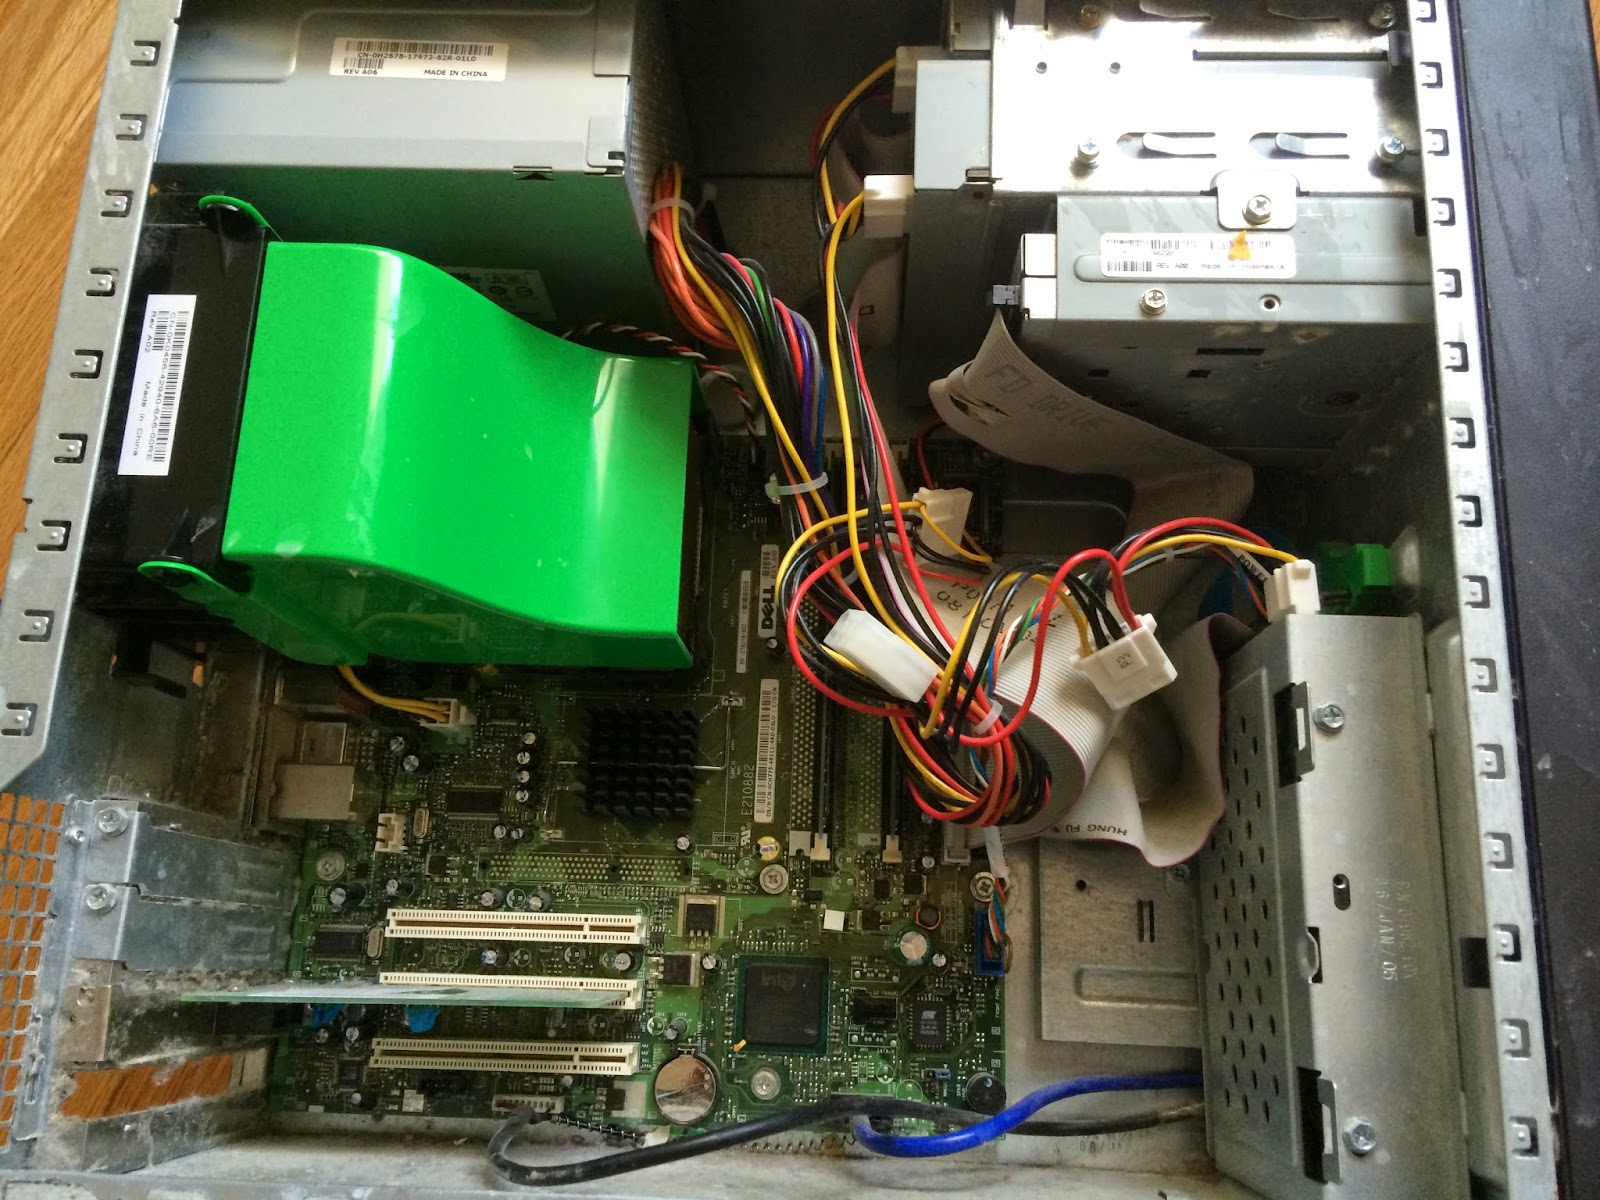
Here we have the PC: a 2004 Dell Dimension 3000

Here is what we saw taking off the back panel- it's gotten very dusty
after 10 years of use

Since this is an older model desktop, there's a lot of older technology

Here's an example of an older piece of technology- those white
"ribbon" 40-wire connections are for a PATA hard drive- which aren't
used anymore. The modern SATA hard drives have a much smaller,
single cable.

Here are the sticks of RAM we pulled from the PC-
adding up to only a total of half a gigabyte.

Heres a network adapter we pulled from a PCI slot-
which I talked about in my last blog post.

Just to identify some parts- those long white strips
on the top left are PCI ports. The long black strips on
the bottom right are RAM slots. The white square on the
top right is the CPU.

Here is the fan and the main power supply for the PC.

Here is the CPU for this desktop. You can identify
this model of CPU as a Pin Grid Array (PGA) from
all of the tiny pins sticking out the back

The front side of the CPU. the white blob on the
front is the cooling paste.

Another computer- my partners. The difference 10
years can make is astounding. Those blue sticks
are armored DDR3 SDRAM sticks- each with the same
amount of memory as 16 of the Dell's RAM sticks.

Second tutorial sets: Section 1.1-1.5


Over Sunday the 27th and Monday the 28th of April, I gained 5 more hours of content for my Capstone project. I did this by starting another set of tutorials that focused mostly on the hardware of a computer- which I will go over in this blog- and also disassembling and reassembling an older 2004 model Dell Dimension 3000.
Section 1.1 of the new tutorials taught about BIOS- a computer's firmware. This is what the computer uses so it knows what to do when it boots up. The BIOS is responsible for starting up other computer components such as the keyboard, monitor, and hard drive. The tutorial showed how to upgrade the BIOS if necessary, how to configure it, how it is kept powered, and how you can use it to run computer diagnostics. Section 1.2 introduced types of motherboards, the architecture of standard-ATX motherboards (the most common type), the different available ports on a motherboard, motherboard RAM slots, different CPU sockets (and therefore different CPU types), motherboard chipsets, and motherboard jumpers and connectors. The motherboard is the piece of hardware in a computer where all data and connection passes through- all other pieces of hardware must be connected to the motherboard in some way. The common sizes of motherboards are Standard-ATX, Micro-ATX, Mini-ITX, Nano-ITX, and Pico-ITX. Each size smaller has less room for expansion, and the ITX series motherboard require less power- and can therefore be found in some portable devices. Each motherboard usually comes with some version of PCI ports- which are sockets that different adapters or "add-ons" can be plugged into. Video cards, wifi-adapters, and USB-adapters are just some of the different utilities that can be plugged into these PCI ports. Every motherboard also has at least one slot for RAM cards (or Random Access Memory cards- which provide the computer with usable memory). It also needs a socket to hold the Central Processing Unit (the CPU)- which have evolved over time and therefore have multiple types of sockets and sizes. The tutorial also went over the layout of a motherboard, and where certain components are usually placed. The motherboard is divided into the northbridge (which handles high-speed connections from the CPU and memory), and the southbridge (which holds slower components like the BIOS and PCI adapters). Section 1.3 went over the different types of memory (when referring to memory, computer technicians are usually talking about the RAM- not the hard drive). The type of memory we see today in the most modern computers is DDR SDRAM- or Double Data Rate Synchronous Dynamic Random Access Memory. Simply put, this type of RAM synchronizes with the motherboard and can go up to twice the speed of previous RAM versions. 1.4 briefly went over the process of installing adapters into the PCI ports. Finally, 1.5 dove into the different types of storage devices. The common ones we see today are SSD's (Solid State Drives) and SATA hard drives. The main difference between these is that SSD's do not have any moving parts inside of them- everything is based on electron movement. Hard drives on the other hand rely on spinning record-like disks, which have memory stored on them.
Taking notes on all of this with the additional hour it took me and my partner to disassemble the Dell computer (which I will create a separae post about) gives me a total of 25 hours, therefore completing my Capstone hour requirement. Although I have all of the hours I need, I will continue to watch and take notes on the tutorials, since I usually have fun with them. They also provide a lot of useful information concerning computer technology- which I will hopefully relay effectively to the Capstone project judges.


(My massive amount of notes packets)

Saturday, April 26, 2014

Scrapping my Old Toshiba Satellite U405D

I spent a total of 4 hours disassembling my old Toshiba Laptop to separate and catalog different parts. I used a process outlined in the tutorial videos to safely remove every part without damage, and used a general laptop disassembly guide I found online to actually identify each part. I began by flipping the laptop and opening two back panels to take out the hard drive and RAM.


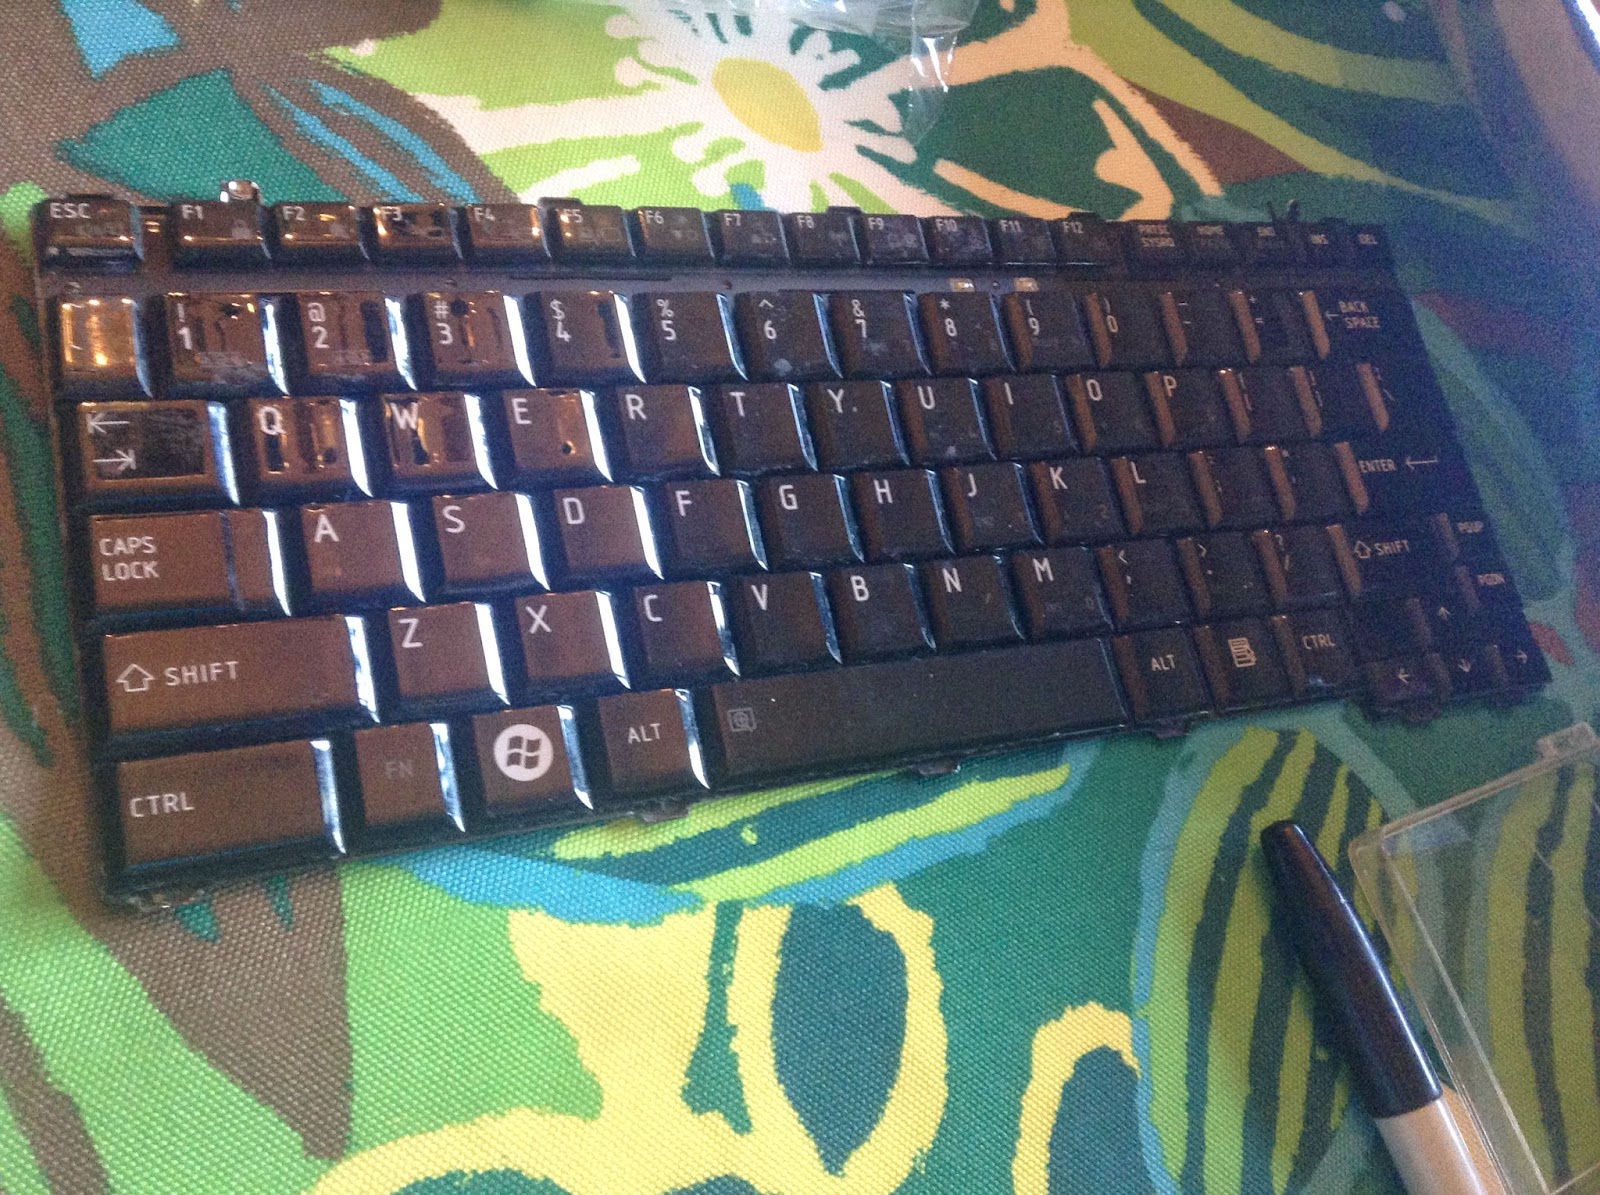
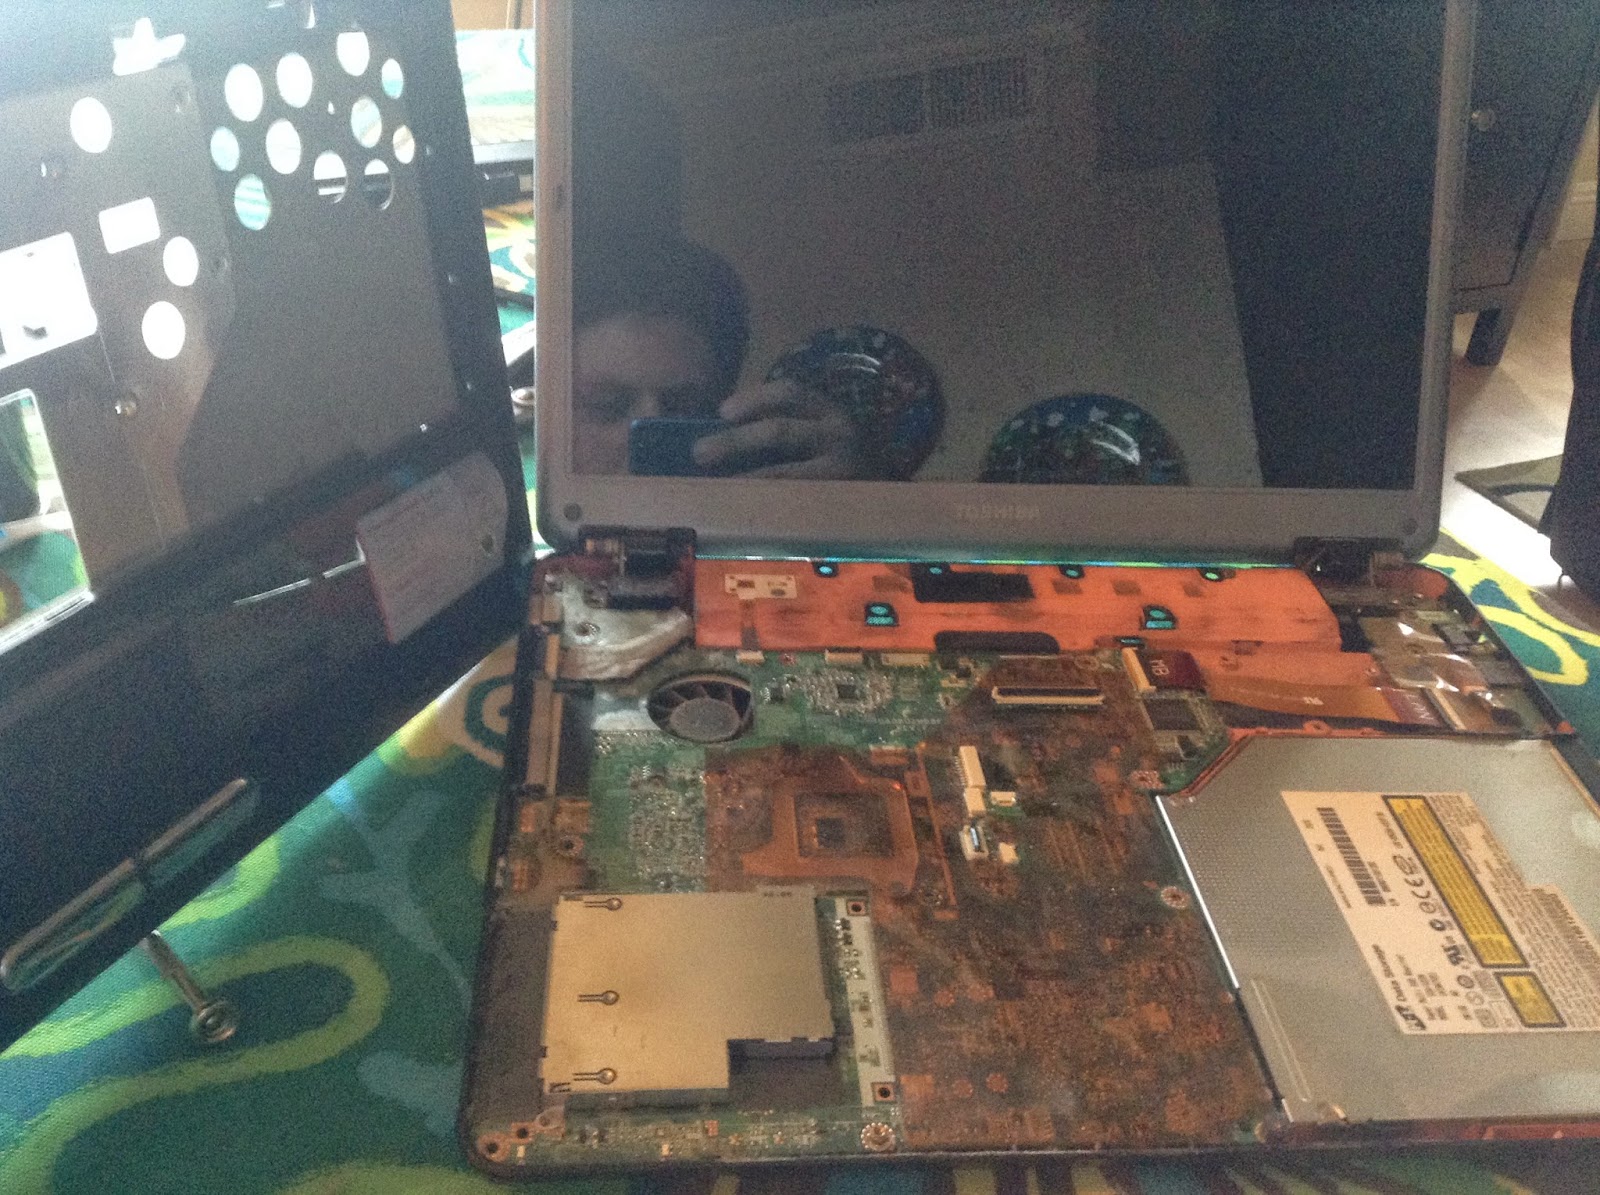
The next step was taking off the keyboard and front panels so I could access the Motherboard and its components.


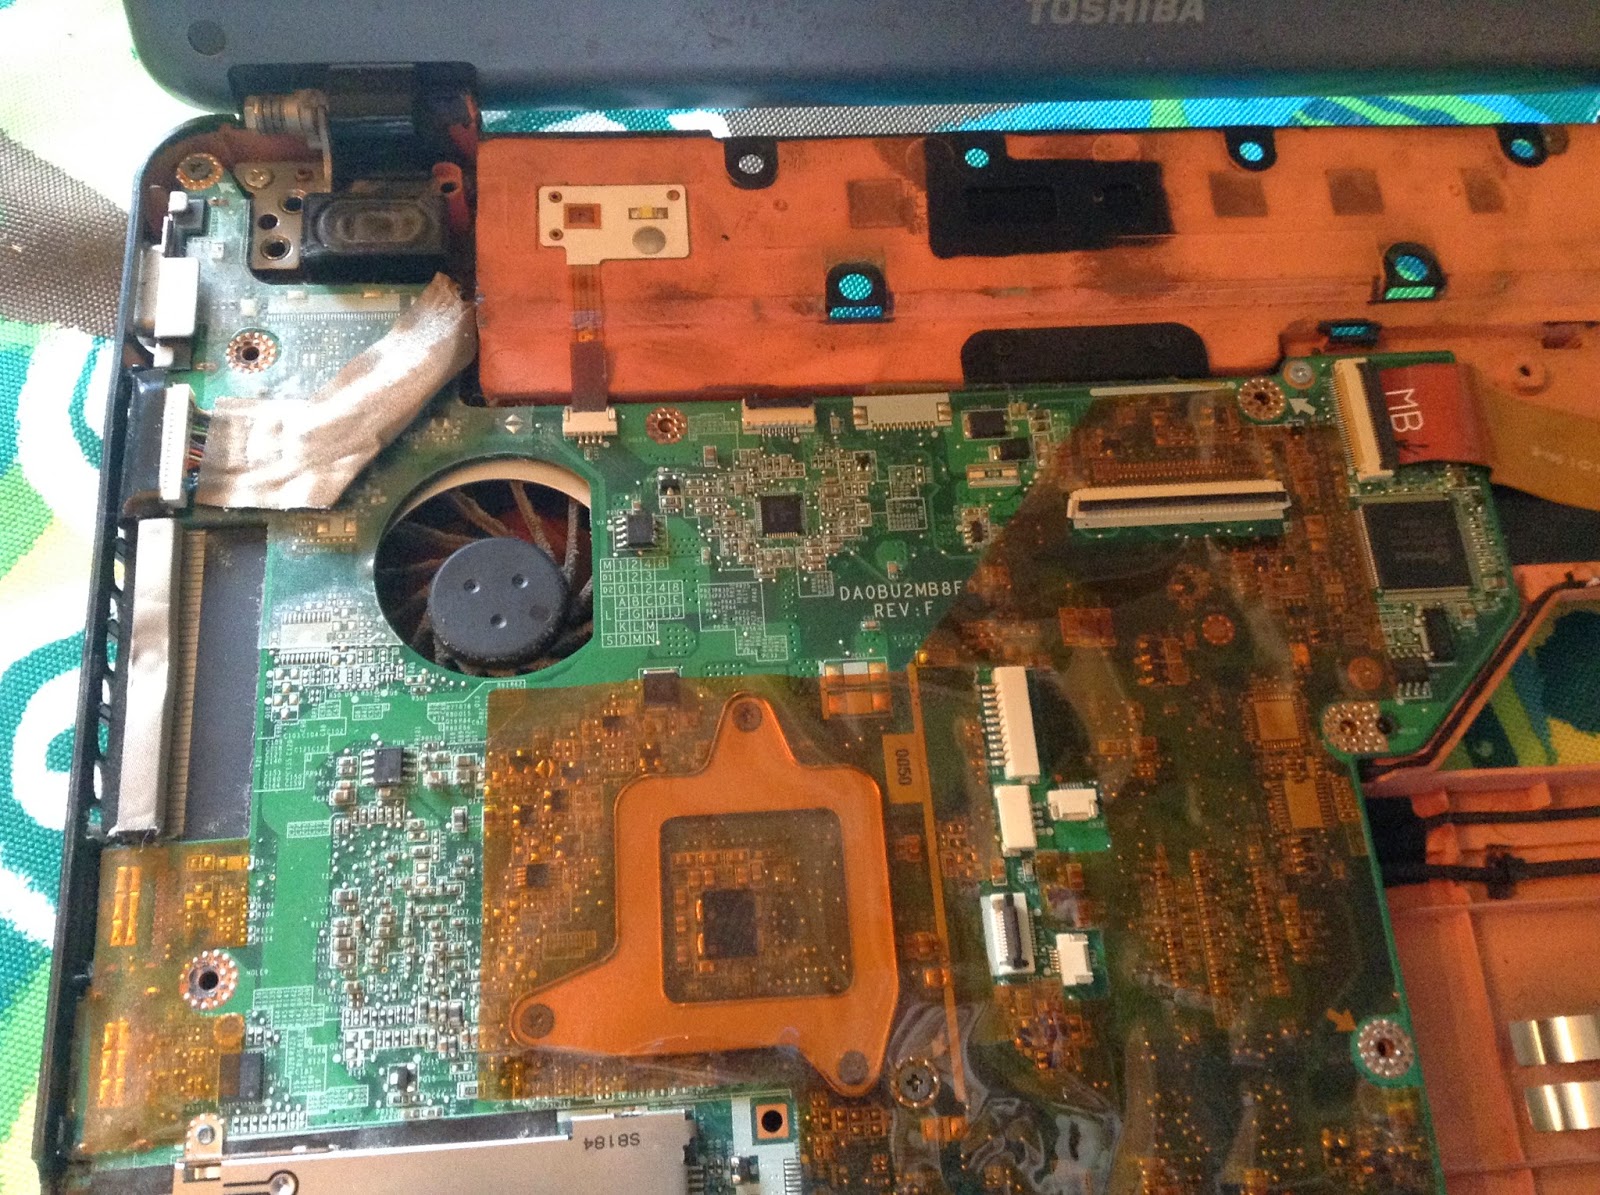
By exposing the motherboard I was able to see why my computer continued to overheat when It was operable... It was extremely dusty.


I finished by removing the Motherboard and removing the LCD display and webcam from their casing


I bagged all of the different parts afterwards. Here are all of the parts and the tools I used to disassemble the laptop:


I decided to see if my current laptop had any available RAM slots so I could give it another 2GB of memory, but all of its slots were taken up. I then took off the back panel of my family's computer to see if I could install it there, and I then learned that Laptops and Desktops have different sized, incompatible, types of RAM cards. I was able to see the layout of our desktop, which may be useful later.

Section 4.2 - 4.9

Yesterday I spent an additional 3 and a half hours going over section 4.2 to section 4.9 for the tutorial videos. Chapter 4 focused on repairing and troubleshooting hardware, firmware, and software for a computer. 4.2 started off with tools you would need to effectively troubleshoot a computer's hardware. One example the tutorial gave was a loopback plug, which is used to troubleshoot networking issues. The plug is inserted into an Ethernet port, and any signal that the computer directs outward will be sent back to the computer. Using specified software, the computer can then diagnose any problems with it's outgoing signals. 4.3 introduced tools needed to troubleshoot the hard drive specifically. For example, file recovery software can be used to recover deleted or lost files by rereading disk space that hasn't been rewritten (so you could essentially bring back a file that you deleted and emptied out of the recycling bin). 4.5 went over tools used for professional networking- such as crimpers and punch-down tools. Since the tutorial only described these physical processes, I looked over different youtube tutorials to fully understand these tools. 4.5 mostly reviewed commands that could be used to troubleshoot your network such as ipconfig, netstat, or nbtstat. 4.6 was one of the most useful sections for me personally. This section went over troubleshooting and recovering an operating system, and discussed tools like system repair disks, REGedit, the event viewer, system recovery, and safe-mode. I had been noticing that over the past week that my laptop's audio had severely dropped in quality, and I was ready to take it to an electronics store to service it, but after watching 4.6 I decided to use system recovery to restore my computer to a saved restore point in March. After using system recovery my audio was back to normal (and I therefore serviced my first computer). 4.7 discussed malware removal and quarantining, and what should be done to a PC when a virus infects it. 4.8 was about disassembling laptops for parts, cleaning, or upgrading. I will discuss this in another blog post, since I decided to scrap my old laptop for parts to complement this section. Lastly, 4.9 went over maintaining laser printers, and what to do if a printer is not responding (most of the time the "printer spooler" service in the computer just failed). After watching the tutorial and taking notes for these sections, I finished with a total of 16 out of 25 hours for my Capstone project.

Monday, April 21, 2014

Section 2.2 to 3.7

I've spent another two and a half hours watching and taking notes on the IT tutorials. Chapter 2.2 discussed different security threats to a computer. Common threats include malware, viruses, rootkits, phishing sites, and worms. Malware can perform many malicious functions, like tracing your keystrokes to look for passwords and pin numbers, or force your computer to participate in Distributed Denial of Service attacks. Viruses are a form of malware that can self-replicate; like a real virus. All of chapter 3 was content on mobile devices and laptops. Section 3.2 focused on mobile device networking, and how Android and Apple phones can be configured to network with your other devices. Chapter 3.4 discussed the differences between tablets and laptops- both in their available services and their hardware. Section 3.7 fully distinguished the differences between the Google Android operating system and Apple's iOS. It also talked about the technology behind device displays, touch screens, accelerometers, and gyroscopes. Including the content today, I now have 12 and a half hours of my Capstone project finished.